
A small dessert can carry a surprising amount of character. Lemon Curd Tartlets do exactly that. Each bite brings a balance of buttery crust and bright, smooth filling that feels both light and satisfying.
They look delicate, but the process is steady and approachable. Once you take it step by step, everything falls into place.
The Story & Emotional Connection
A dessert that feels a little special
The first time I made these, it wasn’t for a big event. It was just one of those days when I wanted something homemade that felt a bit different from the usual cakes and cookies.
Rolling out the dough, pressing it into the pan, and slowly cooking the lemon curd turned into a quiet rhythm. By the time they were set and ready, they felt like something worth sharing, even if it was just at the kitchen table.
Why these tartlets fit real life
Even though they look like something you’d bring to a gathering, they don’t require complicated steps. You can break the process into parts, making the shells one day and the filling another.
They fit both planned occasions and simple moments when you want something homemade that feels thoughtful.
What Makes This Recipe Work
A balance between crisp and creamy
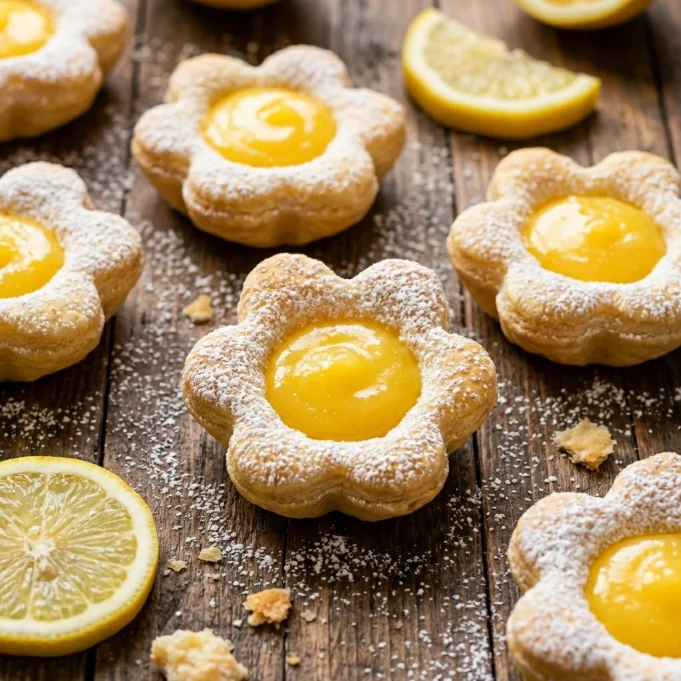
The tartlet shells bake into a firm, lightly crisp base that holds its shape without being too hard. The butter in the dough gives it a gentle richness that pairs well with the filling.
The lemon curd is smooth and soft, with a bright flavor that stands out without overwhelming. The combination of egg yolks, sugar, and lemon juice creates a texture that feels silky and clean.
Together, the contrast between the crust and filling makes each bite feel complete.
A method that builds confidence
This recipe works because it moves in clear stages. You make the dough, let it rest, bake the shells, and then prepare the curd.
Each step has its own pace, which helps avoid feeling rushed. The chilling times might seem long, but they make the final result more reliable and easier to handle.
Making the Recipe at Home
Ingredients
Tartlet Shells
- 250 gr all-purpose / plain flour
- 50 gr icing sugar, sifted
- 1 pinch fine salt
- 120 gr unsalted butter, cold
- 1 large egg, at room temperature
Lemon Curd
- 4 egg yolks
- 100 gr caster sugar or fine white granulated sugar
- 125 ml lemon juice (about 3 large lemons)
- 75 gr unsalted butter, at room temperature
- 1 lemon zest (optional)
Instructions
Tartlet Shells
Place the flour, icing sugar, and salt into a food processor and pulse briefly to combine. Add the cold butter cut into small cubes and blend until the mixture forms fine crumbs.
In a separate bowl, whisk the egg, then add it to the mixture. Pulse slowly until the dough begins to come together.
Bring the dough into a ball and roll it between two sheets of baking paper to about 4 mm thick. Transfer it to a flat tray and refrigerate for at least 1 hour, or up to 24 hours.
Remove the baking paper and cut out circles of dough slightly larger than your muffin pan openings. Gently place each piece into the pan and press it into the base and sides, making sure there are no air pockets.
Return the pan to the refrigerator and chill for at least 2 hours, or overnight if possible.
Preheat the oven to 160°C / 325°F. Prick the bottoms of the shells with a fork and place the pan in the freezer while the oven heats.
Line each shell with crumpled baking paper and fill with baking weights, rice, or beans. Bake for 15 minutes, then remove the weights and paper and bake for another 15 minutes, until the shells are golden and dry. Let them cool completely.
Lemon Curd
In a small saucepan, combine the egg yolks, sugar, and lemon juice. Whisk together, then place over low heat.
Continue whisking for a few minutes until the mixture begins to thicken slightly.
Add the butter in small cubes, one at a time, whisking until each piece melts before adding the next. Stir in the lemon zest if using.
Keep cooking on low heat, whisking constantly, until the curd thickens. This can take anywhere from 5 to 15 minutes.
To check if it’s ready, coat the back of a spoon with the curd and draw a line through it with your finger. If the line stays clear, it’s done.
Assembling
While the curd is still warm, pour it into the cooled tartlet shells.
Tap the tartlets gently on the counter to release any air bubbles, then place them in the refrigerator for at least 2 to 3 hours to set.
Practical tips that help
Keeping the butter cold when making the dough helps create a better texture in the shells.
Avoid overmixing the dough. Once it starts to come together, that’s enough.
Cooking the curd over low heat is important. Higher heat can cause it to thicken too quickly or become uneven.
Common mistakes and how to avoid them
If the dough becomes too soft to handle, place it back in the refrigerator before continuing.
Not chilling the shells before baking can lead to shrinking in the oven. Giving them enough time to rest helps them hold their shape.
Rushing the curd can lead to lumps. Slow, steady whisking keeps it smooth.
Adapting the Recipe
Small changes that work well
You can make the lemon curd ahead of time and store it in the refrigerator. Gently warm it before filling the shells.
If you prefer a stronger citrus flavor, adding the optional lemon zest gives the curd a bit more depth.
You can also adjust the size of the tartlets depending on your pan, creating either smaller bites or slightly larger portions.
Adjusting for different occasions
These tartlets are easy to serve at gatherings because they’re already portioned. They also work well as a make-ahead dessert, since they need time to set.
For a quieter setting, they feel just as right enjoyed slowly with a cup of tea or coffee.
Serving & Enjoyment
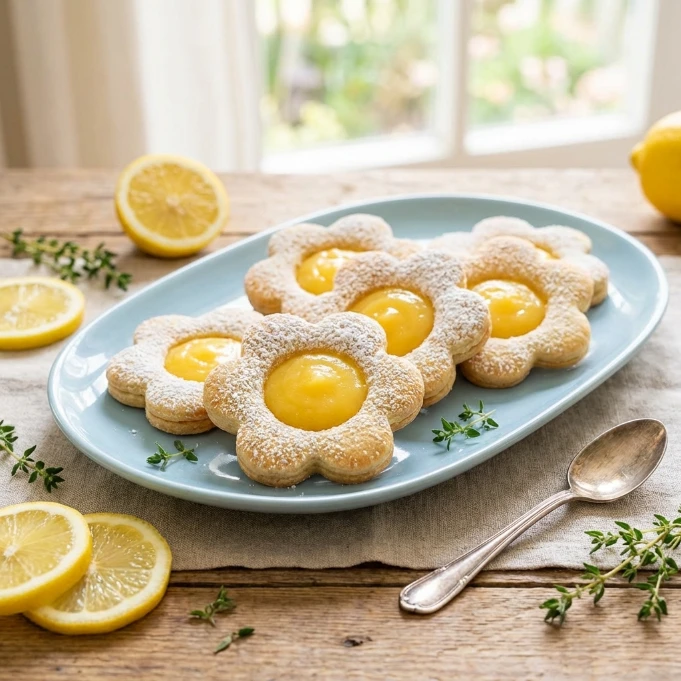
Serve the tartlets chilled once the curd has fully set. The texture is smooth, and the shells hold their crispness.
They fit into many moments, from small celebrations to simple afternoons when you want something homemade and bright.
There’s no need to add much. Their flavor stands on its own.
Storage & Leftovers
Store the tartlets in the refrigerator in a covered container. They keep well for a couple of days.
The shells may soften slightly over time, but the flavor remains balanced and pleasant.
If making ahead, keep the shells and curd separate and assemble closer to serving for the best texture.
FAQ
Can I make the dough without a food processor?
Yes, you can mix it by hand or with a pastry blender. Work the butter into the flour until you get a crumb-like texture, then add the egg.
How do I know when the lemon curd is ready?
It should coat the back of a spoon and hold a clear line when you run your finger through it.
Can I prepare the lemon curd in advance?
Yes, you can make it up to a few days ahead and store it in the refrigerator. Warm it slightly before using.
Why do the tart shells need to chill before baking?
Chilling helps the dough hold its shape and reduces shrinking during baking.
Conclusion
Lemon Curd Tartlets bring together simple ingredients in a way that feels balanced and thoughtful. They take a bit of time, but each step adds to the final result.
In the end, you’re left with something bright, smooth, and quietly satisfying—worth every part of the process.
Lemon Curd Tartlets
Ingredients
Method
- Tartlet Shells
- Place the Flour, Icing Sugar and Salt in the bowl of your Food Processor and pulse to mix (see note 1 if making by hands). Add the cold Butter cut into small cubes, then mix to get very small crumbs.
- Whisk the egg in a separate bowl and add it to the food processor. Slowly pusle until a dough starts to come together (see note 2).
- Bring the dough together into a ball and roll between two sheets of baking paper to be about 4 mm or 1/6 inch thick. Place on a flat tray and leave in the fridge to chill and rest for at least 1 hour, or up to 24 hours.
- Remove the baking paper. With a round or fluted cookie cutter that is about 1,5 to 2 cm (0.6 to 0.8 inch) wider than the opening of the muffin pan, cut out disks of pastry (see note 3). Gently slide the disks of pastry into a muffin pan and lightly press on the bottom corners to make sure the pastry is touching the pan all around – and to remove any air bubbles that could be trapped under the pastry.
- Pro tip: use a muffin pan with perforated bottom to insure an even air flow and optimal baking with minimal shrinkage.
- Place back in the fridge to rest and chill for at least 2 hour – preferably overnight.
- Preheat your oven on 160’C/325’F. Prick the bottom of the pastries with a fork and place the muffin pan in the freezer while the oven is preheating.
- Line each tartlet shells with a small piece of crunched up baking paper and fill with baking beads, rice or beans. Bake for 15 minutes, then remove the weights and baking paper and bake for another 15 minutes, or until golden and dry to the touch. Set aside to cool down completely.
- Lemon Curd
- Place the Egg Yolks, Sugar and Lemon Juice in a small pot. Whisk to combine then turn on very low to low heat. Whisk for a few minutes or until the liquid looks like it is starting to thicken – about 3 to 5 minutes.
- Cut the butter into small cubes and slowly add them to the pot. Whisk until melted and combined each time before adding more. Add the Lemon Zest
- Cook on low heat for 5 to 15 minutes or until the curd has thickened. Continuously whisk to avoid lumps (see note 4).
- To check if the curd is cooked, dip the back of a spoon into the curd then draw a line in the curd with your fingers (be careful, it will be hot). Tip the spoon down and check if any of the curd is dripping down over the clear line. If the line stays clear, the curd is ready. If the curd pours over the line, it needs to cook for longer.
- Assembling the Lemon Tarts
- While still warm, pour the curd into the tartlet shells. Gently tap each tartlet against a hard surface to remove any air bubbles, then place in the fridge to set for at least 2 to 3 hours (see note 5).
Notes
- If you don’t have a food processor, you can make the pastry by hands or using a pastry blender. You can find the detailed step by step instructions on how to make the dough by hands here.
- Avoid overworking the pastry by stopping as soon as part of the pastry comes together. To know it is mixed enough, press some lumps of pastry between your hand. If they should stick together, the pastry is ready. If too dry, add a little bit of very cold water. If very sticky, add a little bit more flour.
- The wider you cut out the circles of pastry, the deeper the tartlet shells will be. It is up to you how wide you cut them out, but I recommend having the width of the muffin pan openings as a minimum. Otherwise, the crusts will be quite flat and not deep enough for a filling.
- The time it will take for the curd to be cooked will depend on the heat of your stove. You should always cook a curd on very low heat to avoid burning it or getting lumps.
- You could also make the lemon curd in advance (up to 3 days in advance) and slightly reheat it up to fill the tartlets on the day you need them. Either reheat on a double-boiler, or for a few seconds in the microwave (but be careful not to reheat for to long or you might cook it).
Calories: 179kcal | Carbohydrates: 20g | Protein: 2g | Fat: 10g | Saturated Fat: 6g | Trans Fat: 1g | Cholesterol: 76mg | Sodium: 9mg | Potassium: 33mg | Fiber: 1g | Sugar: 9g | Vitamin A: 342IU | Vitamin C: 3mg | Calcium: 12mg | Iron: 1mg