
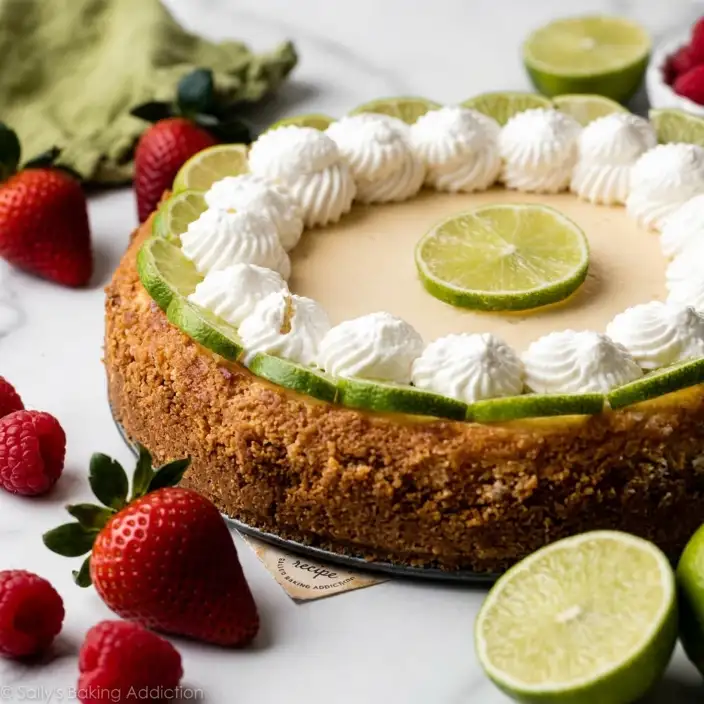
There’s something about a chilled cheesecake that feels steady and satisfying, especially when it carries a bright citrus note. Key Lime Cheesecake brings that contrast to life in a simple, comforting way. It’s smooth, rich, and balanced with a fresh lime flavor that keeps each bite from feeling too heavy.
This is the kind of dessert you make when you want something that holds its shape, slices cleanly, and feels worth the wait once it’s fully set.
The Story & Emotional Connection
A dessert that rewards patience
The first time I made a cheesecake like this, I didn’t realize how much the waiting mattered. You mix, bake, and then step back while it slowly cools and chills. It teaches you to let things settle in their own time.
By the time it’s ready, it feels like more than just dessert. It feels finished in a quiet, satisfying way.
Why this recipe fits real life
Even though cheesecake sounds like a project, this one breaks down into clear steps. You build a crust, mix a filling, and let the oven and fridge do most of the work.
It’s a good choice when you want to prepare something ahead of time and not worry about it later.
What Makes This Recipe Work
A smooth and balanced filling
The cream cheese creates a rich base, while the key lime juice adds a gentle brightness. Sour cream softens the texture and rounds everything out. The result is creamy without feeling too dense.
The graham cracker crust adds a slight crunch that contrasts nicely with the filling.
A method you can trust
Each step has a purpose, from pre-baking the crust to carefully mixing the filling. Adding the eggs one at a time helps keep the texture smooth, and the slow cooling process helps the cheesecake set properly.
It’s a steady process that leads to consistent results.
Making the Recipe at Home
Ingredients
Graham Cracker Crust:
- 1 and 1/2 cups (180g) graham cracker crumbs (about 12 full sheet graham crackers)
- 5 Tablespoons (71g) unsalted butter, melted
- 1/4 cup (50g) granulated sugar
Cheesecake Filling:
- 32 ounces (904g) full-fat brick PHILADELPHIA Cream Cheese, softened to room temperature
- 1 cup + 2 Tablespoons (225g) granulated sugar
- 1/2 cup (120ml) key lime juice
- 1/3 cup (80g) sour cream or plain yogurt, at room temperature
- 1 teaspoon pure vanilla extract
- 2 teaspoons key lime zest
- 3 large eggs, at room temperature
Optional Toppings:
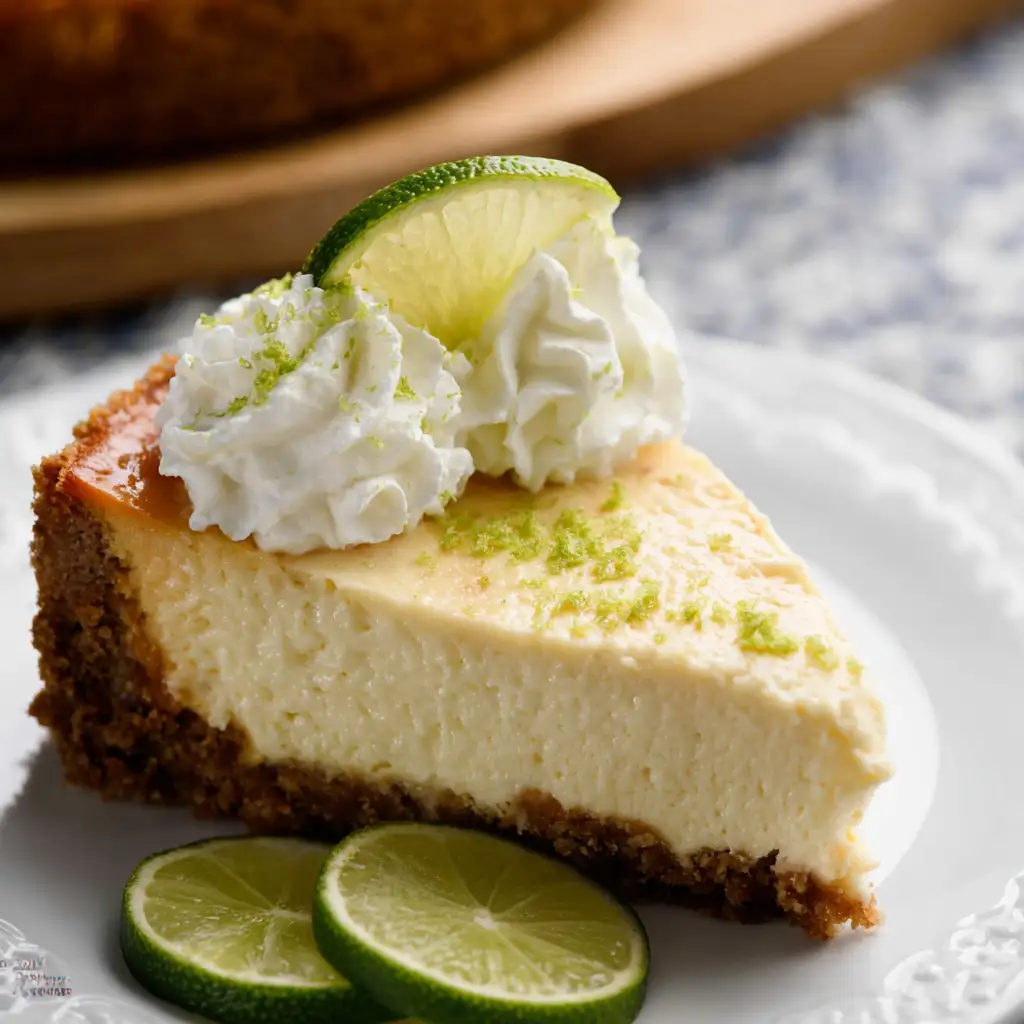
- homemade whipped cream
- fresh berries
- key lime or regular lime slices
Instructions
Adjust your oven so one rack sits in the center and another is placed below it. Preheat the oven to 350°F (177°C).
Make the crust:
If your graham crackers aren’t already crushed, pulse them into fine crumbs using a food processor. Place the crumbs in a bowl and stir in the sugar and melted butter until the mixture resembles damp sand.
Press the mixture firmly into the bottom and slightly up the sides of a 9-inch springform pan. Use the bottom of a measuring cup to pack it down tightly. Bake for 10 minutes, then remove and let it cool slightly while preparing the filling.
Make the filling:
In a large bowl, beat the cream cheese and sugar together until smooth and creamy. Add the key lime juice, sour cream, vanilla extract, and lime zest. Mix until fully combined.
Add the eggs one at a time, mixing on medium speed after each addition until just blended. Once the final egg is mixed in, stop stirring to avoid overworking the batter.
Pour the filling over the warm crust and smooth the top.
Prepare the water bath:
Bring water to a boil. Place a large metal pan on the lower oven rack and pour in about 1 inch of hot water. Immediately place the cheesecake on the center rack above it. Close the oven door to trap the steam.
Bake for 55–70 minutes, until the center is nearly set but still slightly wobbly when gently tapped.
Turn off the oven and crack the door open slightly. Let the cheesecake sit inside for 1 hour. Then remove it and allow it to cool completely at room temperature.
Refrigerate for at least 4 hours or overnight.
Once chilled, run a knife around the edge to loosen it from the pan, then remove the outer ring. Add any toppings you like before slicing.
Helpful tips
Make sure all ingredients are at room temperature before mixing. This helps the filling come together smoothly.
Stop mixing once the eggs are incorporated. Overmixing can affect the texture as it bakes.
Common mistakes to avoid
Skipping the cooling steps can lead to cracks or a dense texture. Let the cheesecake cool gradually.
Not using steam in the oven can make the top dry out more quickly. The added moisture helps keep the texture even.
Adapting the Recipe
Simple variations
If key limes aren’t available, you can use the same amount of regular lime juice and zest. The flavor will still be bright and refreshing.
You can also change the topping depending on what you have—whipped cream alone or with fresh fruit both work well.
Different situations
This cheesecake is ideal for making ahead. It needs time to chill, which makes it a good option when you want to prepare dessert the day before.
It also freezes well, so you can make it in advance and save it for later.
Serving & Enjoyment
Serve the cheesecake chilled for the best texture. The filling will be firm yet creamy, and the crust will hold together nicely.
It works well for gatherings, holidays, or any time you want a dessert that feels complete and ready to share.
Storage & Leftovers
Store the cheesecake covered in the refrigerator for up to 5 days.
For longer storage, you can freeze it. Wrap it well and thaw in the refrigerator before serving.
FAQ
Can I make this cheesecake ahead of time?
Yes, it’s actually best when made in advance so it has time to fully chill and set.
What if I can’t find key limes?
You can use regular lime juice and zest in the same amounts.
Why is my cheesecake cracking?
Cracks can happen if the batter is overmixed or if it cools too quickly. Following the gradual cooling steps helps prevent this.
How do I get clean slices?
Use a sharp knife, wipe it clean, and dip it in warm water between each cut
Conclusion
Key Lime Cheesecake brings together a creamy texture and a bright citrus flavor in a way that feels calm and satisfying. It takes a little time, but most of that time is simply letting it rest and set.
Once it’s ready, it’s the kind of dessert that feels steady, sliceable, and easy to share.
Key Lime Cheesecake
Ingredients
Method
- Adjust the oven rack to the center position, with a lower oven rack in place for the water bath described in step 5, and preheat oven to 350°F (177°C).
- Make the crust: If your graham crackers aren’t crumbs yet, use a food processor to pulse them into fine crumbs. Pour crumbs into a medium bowl and stir in sugar and melted butter until combined. Mixture will be sandy. Press firmly into the bottom and slightly up the sides of a 9-inch springform pan. No need to grease the pan first. I use the bottom of a measuring cup to pack the crust down tightly. Pre-bake for 10 minutes. Remove from the oven and allow crust to slightly cool as you prepare the filling.
- Make the filling: Using a handheld or stand mixer fitted with a paddle attachment, beat the cream cheese and granulated sugar together on medium-high speed in a large bowl until the mixture is smooth and creamy, about 2 minutes. Add the lime juice, sour cream, vanilla extract, and lime zest then beat on medium-high speed until fully combined. On medium speed, add the eggs one at a time, beating after each addition until just blended. After the final egg is incorporated into the batter, stop mixing. To help prevent the cheesecake from deflating and cracking as it cools, avoid over-mixing the batter as best you can.
- Pour cheesecake batter into warm crust. Use a rubber spatula or spoon to smooth it into an even layer.
- Prepare the simple water bath (see recipe note for traditional water bath method): Boil a kettle or pot of water. You need 1 inch of water in your roasting pan for the water bath, so make sure you boil enough. Place a large metal baking or roasting pan (I usually use a 9×13-inch baking pan—do not use glass) on the bottom rack of the preheated oven. Pour boiling water into pan, about 1 inch deep. Immediately place the cheesecake on the center rack. Close oven to trap the steam inside. This unique water bath adds steam to the oven without having the cheesecake sit inside the water itself, which is the traditional water bath method explained in the recipe Notes. See How to Make a Cheesecake Water Bath for more information.
- (Note: if you notice the cheesecake browning too quickly on top, tent it with aluminum foil halfway through baking.) Bake cheesecake for 55–70 minutes or until the center is almost set. When it’s done, the center of the cheesecake will slightly wobble if you gently tap the pan. Turn the oven off and open the oven door slightly. Let the cheesecake sit in the oven as it cools down for 1 hour. Remove from the oven, then cool cheesecake completely at room temperature. Then refrigerate the cheesecake for at least 4 hours or overnight.
- Use a knife to loosen the chilled cheesecake from the rim of the springform pan, then remove the rim. Add optional toppings if desired. I used a piping tip for the pictured whipped cream. Using a clean sharp knife, cut into slices for serving. For neat slices, wipe the knife clean and dip into warm water between each slice.
- Cover and store leftover cheesecake in the refrigerator for up to 5 days.
Notes
- Make Ahead Instructions: This cheesecake can be made the day before. It has to chill for quite some time before serving. See step 6. Another way to make this cheesecake ahead of time is to freeze it. Cheesecake can be frozen up to 3 months. See instructions in blog post above.
- Special Tools (affiliate links): Food Processor | 9-inch Springform Pan | Electric Mixer (Handheld or Stand) | Citrus Zester | Silicone Spatula | Oven-Safe Roasting Pan (I use this 9×13-inch baking pan)
- Key Limes: If you don’t have access to key limes, use the same amount of regular lime juice and lime zest instead. You can usually find bottled key lime juice next to the regular lime juice in most grocery stores.
- Traditional Water Bath: Boil a pot of water. You need 1 inch of water in your roasting pan for the water bath, so make sure you boil enough. As the water is heating up, wrap aluminum foil around the springform pan—you can do this before or after you pour in the cheesecake batter. Place the wrapped pan inside of a large roasting pan. Carefully pour the hot water inside of the pan and place in the oven. (Or you can place the roasting pan in the oven first, then pour the hot water in. Whichever is easier for you.) Bake as directed. When cooling the cheesecake in the oven in step 6, leave it sitting inside the water bath. Remove it from the water bath when letting it cool at room temperature.
- Room Temperature Ingredients: Bring all cold ingredients to room temperature before beginning. Room temperature ingredients combine quickly and evenly, so you won’t risk over-mixing. Also, beating cold ingredients together will result in a chunky cheesecake batter, hardly the way you want to begin!
- Non-US Readers: Don’t have graham crackers where you live? Don’t have graham crackers where you live? Use 200g ground digestive biscuit crumbs instead (about 13–14 biscuits), the same amount of butter, and add a bit more sugar (about 1/3 cup, or 67g). You may need to add a few extra minutes to the pre-baking time, as digestive biscuits are not quite as crispy-crunchy as graham crackers. And from what I understand, spreadable cream cheese sold in a tub in countries outside of the US is a little different from the spreadable cream cheese in the US. It’s thicker, sturdier, and more solid and should be OK to make cheesecake. I have no experience with it, but this is what I’ve heard from other non-US readers.