
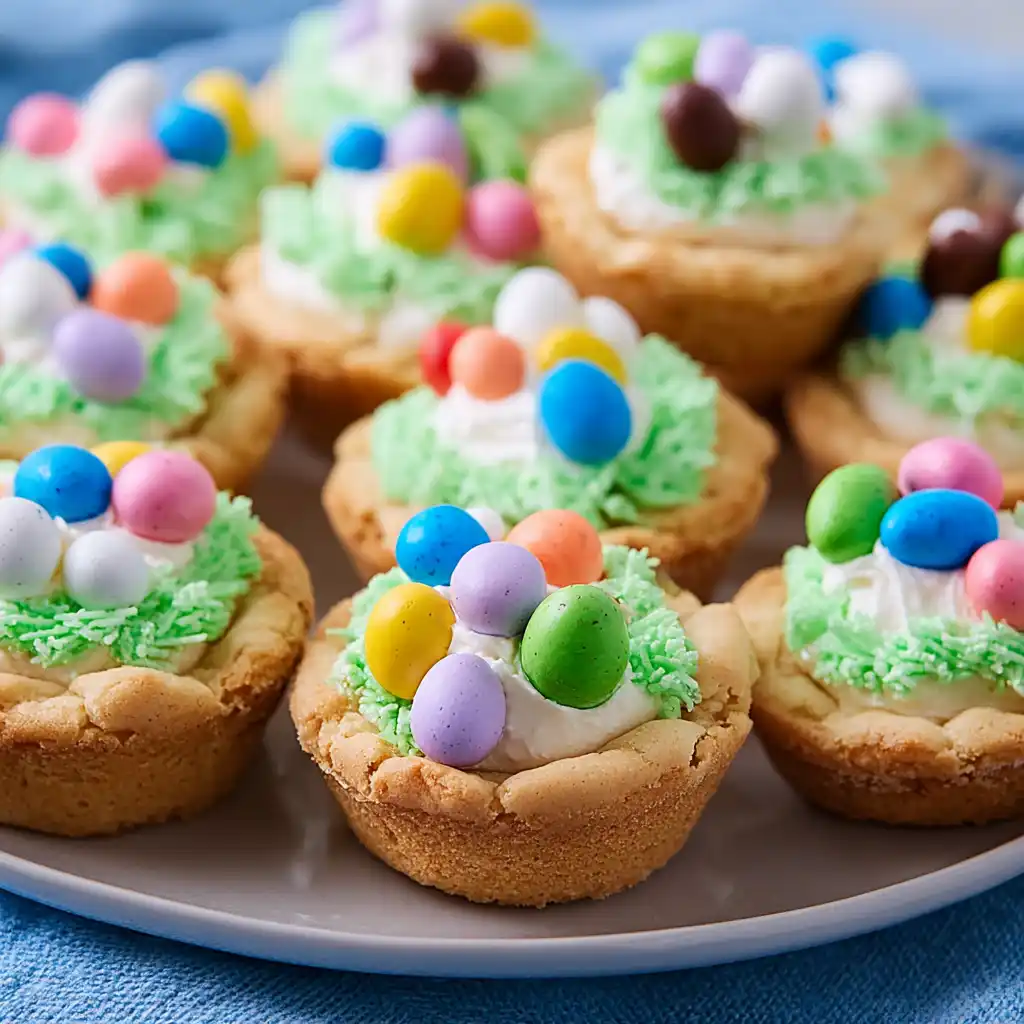
Bright candy colors, soft sugar cookies, and creamy frosting all come together in these cheerful Easter Basket Cookie Cups. They look festive enough for a holiday table but feel simple enough to make on a relaxed afternoon at home.
I like recipes that bring a little fun into the kitchen without turning the whole day into a project. These cookie cups do exactly that. They start with premade cookie dough, bake right in a muffin tin, and end up looking like tiny baskets filled with chocolate eggs.
They’re the kind of treat that catches everyone’s attention right away. Kids reach for them first, and adults usually follow close behind. The cookie base stays soft, the frosting adds a creamy layer, and the chocolate eggs finish everything with just the right amount of sweetness.
Whether you’re baking for an Easter gathering or just want something playful to share, these little cookie cups bring a cheerful touch to the table.
A Sweet Memory Behind These Cookie Cups
Holiday baking has always been less about perfection and more about the moments around the kitchen table. I remember one Easter afternoon when the kitchen was filled with bowls, sprinkles, and a lot of laughter.
We were trying to make desserts that looked like tiny baskets. Some worked. Some looked more like colorful cookie experiments. But the ones that turned out best were these cookie cups.
Pressing the center of warm cookies to make a little space for frosting felt like a small trick that changed everything. Once the frosting and chocolate eggs went in, they suddenly looked like miniature Easter baskets.
It became one of those simple traditions that kept showing up every spring.
Why Easter Basket Cookie Cups Fit Real Life
Not every holiday recipe needs a long ingredient list or complicated steps. Easter Basket Cookie Cups are a great example of something that feels festive without asking too much from the cook.
The cookie base comes from prepared dough, which saves time and keeps things consistent. Instead of rolling and shaping dozens of cookies, the dough goes straight into a muffin tin.
That simple step creates the perfect shape for filling later.
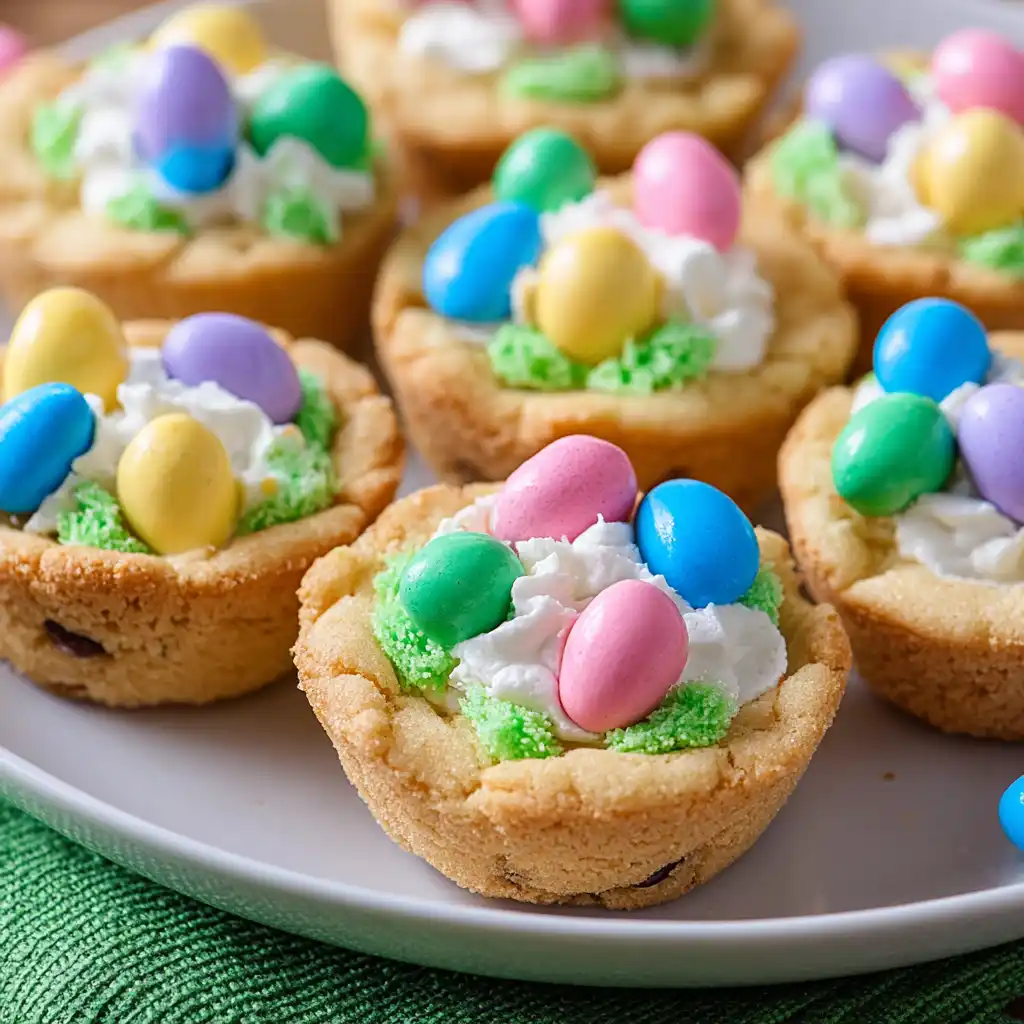
The frosting brings softness and sweetness, while the chocolate eggs add a playful finishing touch. Together they create a dessert that feels special without being complicated.
For busy families or anyone who wants a low-stress baking day, this recipe fits right in.
What Makes These Cookie Cups Work
The best part of this recipe is the balance of textures.
The cookie base stays soft and slightly chewy. Baking it in a muffin tin naturally forms thick edges that hold the filling well. When the center is pressed down after baking, it creates a neat space for frosting.
The frosting itself is rich and smooth, thanks to butter and powdered sugar. A little vanilla gives it a familiar bakery-style flavor.
Then come the chocolate eggs.
They bring color, crunch, and a little surprise in every bite. That small addition changes the cookies from simple treats into something that looks ready for a celebration.
A Dependable Dessert for Holiday Baking
Some recipes look beautiful but feel stressful to prepare. These cookie cups are the opposite.
The steps are straightforward. The ingredients are easy to find. And the results are consistent each time you make them.
Even if your frosting swirls aren’t perfect or the candies sit a little unevenly, the finished cookie cups still look charming.
In fact, the slightly imperfect ones often look the most homemade and inviting.
Making Easter Basket Cookie Cups at Home
Ingredients
For the cookies:
1 16 ounce package Pillsbury Sugar Cookie Dough
For the frosting:
1 cup unsalted butter, softened to room temperature
3 cups powdered sugar
1 teaspoon vanilla extract
⅛ teaspoon coarse kosher salt
1–2 tablespoons milk
Food coloring
For topping:
2.9 ounce packages Hershey’s Egg Candies, or similar candy
Equipment
tart shaper
wire cooling racks
muffin tins
Instructions
Making the Cookie Cups
Preheat the oven to 350℉ and generously spray a regular sized muffin tin with baking spray.
Separate the premade cookie dough and place one section of dough into each muffin well.
Bake the cookies according to the package instructions until they turn lightly golden.
Right after removing the pan from the oven, gently press the center of each cookie using a tart shaper or the bottom of a spice jar. Press slowly and lightly to form a small indentation in the middle.
This space will later hold the frosting.
Allow the cookies to rest in the pan for about five minutes. Then carefully lift them out using a butter knife if needed and move them to a wire cooling rack.
Let them cool completely before adding frosting.
Preparing the Frosting
Place the softened butter in a large mixing bowl and beat it until it becomes light and pale, about two to three minutes.
Add the powdered sugar one cup at a time while mixing on low speed until fully combined.
Increase the mixer speed to medium and continue beating until smooth.
Mix in the vanilla extract and salt.
Add one tablespoon of milk and continue mixing. If the frosting feels too thick, add a little more milk until it reaches a smooth, pipeable consistency.
Beat the frosting for another two to three minutes until it becomes light and fluffy.
If you want colorful frosting, add gel food coloring one drop at a time until you reach the shade you like.
Transfer the frosting to a piping bag.
Assembling the Cookie Cups
Once the cookie cups are completely cool, pipe frosting into the center indentation of each cookie.
Top each one with three chocolate eggs.
Arrange the finished cookie cups on a serving plate and they’re ready to enjoy.
Helpful Tips for Home Bakers
A few small habits can make these cookie cups even easier to prepare.
First, spray the muffin tin generously. Sugar cookie dough can stick easily, and a well-coated pan helps the cookies release without breaking.
Press the centers while the cookies are still warm. Waiting too long allows the cookie to firm up, which makes shaping harder.
If the cookie rises slightly after pressing, simply press again gently while it’s still soft.
Let the cookies cool fully before frosting them. Warm cookies can melt the frosting quickly.
These small details make the process smoother from start to finish.
Common Mistakes and Easy Fixes
One common issue is pressing the cookies too firmly. A light touch works best. Press slowly so the edges stay thick enough to hold the filling.
Another mistake is adding too much milk to the frosting. Start with one tablespoon and only add more if the mixture feels very stiff.
If the frosting becomes too soft, mix in a little powdered sugar to thicken it again.
Finally, avoid placing the candies on warm frosting that hasn’t set slightly. Waiting a minute or two keeps the eggs from sliding off.
Fun Ways to Change the Recipe
This recipe works as a starting point for many playful variations.
Green coconut sprinkled over the frosting can look like grass inside the basket.
Mini Cadbury eggs can replace the Hershey’s candies if you prefer their flavor.
You can also switch the frosting flavor. Cream cheese frosting adds a gentle tang, while chocolate frosting creates a deeper sweetness.
The cookie base can change too. Peanut butter cookie dough or chocolate chip cookie dough both work well, though baking times may differ slightly.
Each small change creates a slightly different dessert while keeping the same cheerful look.
Serving Easter Basket Cookie Cups
These cookie cups fit easily into many Easter moments.
They look lovely on a dessert table next to pastel candies and cakes. They also work well tucked into Easter baskets as an extra sweet surprise.
For family gatherings, arrange them on a large platter so everyone can grab one.
Kids especially enjoy them because they look like tiny edible baskets.
They’re also easy to transport, which makes them a good choice for potlucks or holiday brunches.
Storing and Enjoying Leftovers
If you have leftover cookie cups, store them in an airtight container at room temperature.
They usually keep well for two to three days.
If the frosting becomes slightly soft, placing the container in the refrigerator for a short time helps it firm up again.
The cookie base may become a little softer after a day, but many people actually enjoy that texture.
You can also prepare the cookie cups a day ahead and frost them closer to serving time.
Frequently Asked Questions
Can I make Easter Basket Cookie Cups ahead of time?
Yes. The cookie cups can be baked one day in advance. Store them in an airtight container and frost them before serving for the freshest look.
What can I use if I don’t have a tart shaper?
The bottom of a spice jar works well. Anything with a small flat surface can gently press the center of the cookie.
Can I use different candies?
Absolutely. Mini chocolate eggs, jelly beans, or small candy-coated chocolates all work nicely.
Can I make these with homemade cookie dough?
Yes. Any sugar cookie dough can work in this recipe. Just watch the baking time since different dough recipes bake differently.
Closing Thoughts
There’s something quietly joyful about desserts that look playful without being complicated.
Easter Basket Cookie Cups bring together soft cookies, creamy frosting, and colorful candy in a way that feels both festive and relaxed. They invite people to gather around the table, pick one up, and smile before even taking the first bite.
That’s the kind of baking that stays memorable long after the holiday ends.
Easter Basket Cookie Cup
Ingredients
Equipment
Method
- For the cookies:
- Preheat the oven to 350℉. Liberally spray a regular sized muffin tin with baking spray.
- Separate the premade cookie dough and put one section of dough in each well.
- Bake for 10-14 minutes until lightly browned (according to package instructions.)
- Immediately after baking, using a tart shaper or the bottom of a spice jar, LIGHTLY and SLOWLY press the centers of the cookies down. This creates a small indentation for the frosting.
- Let the cookies cool for about 5 minutes in the tin and then carefully remove them by using a butter knife to help lift them out of the wells. Transfer to a cooling rack to finish cooling.
- For the frosting:
- In a large mixing bowl, beat the butter until light and pale in color, about 2-3 minutes.
- Add the powdered sugar, one cup at a time, and beat on low until all the powdered sugar has been added. Increase mixer speed to medium and beat until fully combined.
- Add the vanilla extract and salt.
- Add 1 tablespoon of milk and continue to beat, adding a little more milk until desired consistency is reached. Beat for an additional 2-3 minutes until the frosting is light and fluffy.
- If coloring frosting, add the gel food coloring one drop at a time until desired color is achieved. Add the frosting to a piping bag.
- After the cookies have completely cooled, pipe the frosting into the middle of the cookie cup. Top with 3 chocolate eggs.
- If you’ve tried this recipe, come back and let us know how it was in the comments or star ratings.
Notes
Calories: 247kcal | Carbohydrates: 31g | Protein: 1g | Fat: 13g | Saturated Fat: 7g | Polyunsaturated Fat: 1g | Monounsaturated Fat: 4g | Trans Fat: 1g | Cholesterol: 24mg | Sodium: 74mg | Potassium: 33mg | Fiber: 1g | Sugar: 26g | Vitamin A: 245IU | Calcium: 5mg | Iron: 1mg