
Introduction
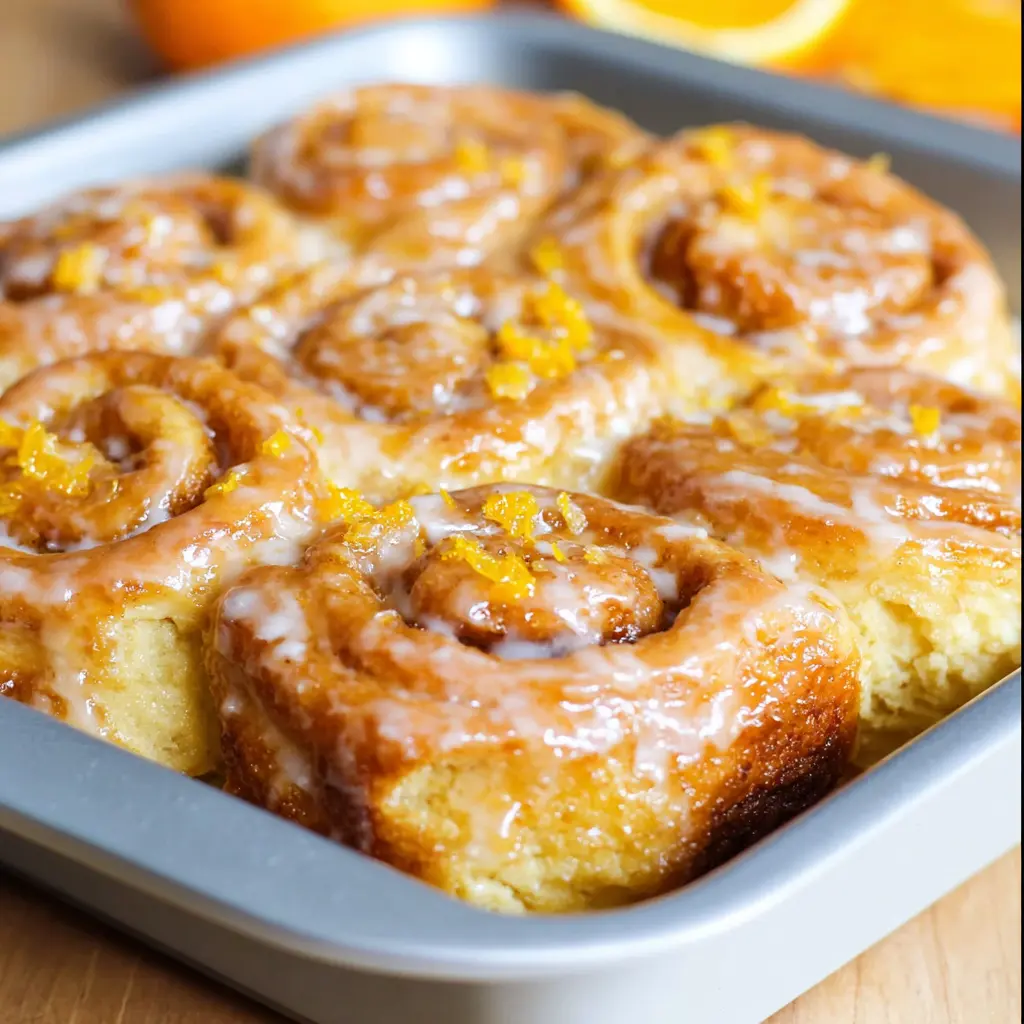
There’s something magical about the smell of sweet rolls baking in the morning. When they’re filled with fresh orange marmalade and finished with a glossy glaze, the scent becomes irresistible. Glazed orange sweet rolls take everything you love about traditional cinnamon rolls and replace the spice with a burst of citrus flavor. The soft, buttery dough, tangy orange filling, and silky glaze make every bite taste like sunshine. Whether you bake them for brunch or as a cozy weekend treat, these rolls will fill your kitchen with warmth and the promise of something sweet.
The Story Behind My Glazed Orange Sweet Rolls
A Morning Worth Remembering
It started on a winter morning when the sky looked pale and quiet. I wanted something bright, something that felt like summer, even if the air was cold. A jar of orange marmalade caught my eye. The idea came quickly — soft rolls swirled with citrus, baked until golden, and topped with a smooth orange glaze. I mixed the dough and waited for it to rise while the kitchen filled with a buttery scent. When I pulled the rolls from the oven, their tops glowed like sunrise. That first bite was sweet, tender, and bright enough to make the whole day feel lighter.
Why Glazed Orange Sweet Rolls Always Impress
Unlike traditional rolls that can feel heavy, these sweet rolls stay soft and airy thanks to the buttermilk and butter-rich dough. The filling is simple but bold a mix of brown sugar and orange marmalade that melts together while baking. The glaze ties it all together, adding a creamy citrus finish that makes them unforgettable. Every step, from kneading to glazing, builds layers of flavor and texture that are pure comfort. These rolls are perfect for sharing, though they rarely last long once you taste them warm from the pan.
Glazed Orange Rolls
Ingredients
Method
- Make the Dough
- To the bowl of a stand mixer fitted with the dough hook (or use a large mixing bowl and wooden spoon and your hands), add 3 cups flour, sugar, yeast, salt; set aside.
- In 2-cup glass measuring cup or microwave-safe bowl, and the butter and heat to melt, about 1 minute on high power.
- Add buttermilk to melted butter and warm to temperature, about 45 seconds on high power in the microwave. (Based on the type of yeast used, milk temperatures will vary. Red Star Platinum yeast calls for warmer temperatures than most, 120 to 130F; other brands and yeast call for much lower temperatures, about 95 to 105F. Heat the mixture according to manufacturer’s recommendations on the packaging. Taking the temperature with a digital thermometer is highly recommended, but if you’re not, make sure the milk is warm, not hot. Err on the cooler rather than hotter side so you don’t kill the yeast.) If the milk separates or gets a little funny looking after being warmed, whisk it to smooth it out.
- Add butter-buttermilk mixture to the dry ingredients in mixing bowl.
- In a small bowl, crack and lightly whisk the eggs, and then add eggs to mixing bowl.
- Turn mixer on low speed and allow it to knead dough for about 5 to 7 minutes (about 7 to 10 minutes by hand using a wooden spoon and then switching to your hands). 3 cups of flour and 5 minutes is perfect for me, but if after 5 minutes your dough is very sloppy, wet, and won’t come together, add up to 1/4 cup flour, or as needed until it does come together. However, the more flour added, the denser and heavier the rolls will be; wetter dough is preferred to overly dry. If dough is dry or crumbly, drizzle in buttermilk until it comes together.
- Remove dough from the mixing bowl, spray a large bowl with cooking spray, place the dough in the bowl, and flip it over once so it’s lightly oiled on both top and bottom.
- Cover bowl with plasticwrap and place it in a warm, draft-free place to rise for about 2 to 2 1/2 hours, or doubled in size. I keep my bowl inside a powered-off oven that I preheated for 1 minute to 400F, then it’s powered off. Do not, repeat do not, keep the oven on. The pre-heated, warm oven creates a nice 85F-ish environment, ideal for yeast. If your rising spot is cold, rising will likely take longer than 2 1/2 hours.
- While dough rises, line a 9×13-inch pan with aluminum foil, spray with cooking spray; set aside.
- Roll Out the Dough & Fill
- After dough has doubled in size, punch it down. Turn dough out onto a Silpat or floured countertop.
- With a rolling pin, roll it out to about 26-by-13-inches. Use the 13-inch side of the 9-x13 pan to eyeball it, no need use a ruler.
- Using a knife, evenly spread butter over dough, leaving a 1/2-inch bare margin.
- Add about 3/4 cup marmalade, more as needed, and smooth it with a knife. It should be a thin-ish layer; too much and you risk it leaking, but not enough and the rolls aren’t orangey enough; use your judgment. The butter and marmalade get smeared together, which is okay.
- Evenly sprinkle the brown sugar over the top, and lightly pat it down with your fingertips to help it adhere.
- Slice the Dough
- Starting with a long edge (the 26-inch side), roll the dough into a tightly wound log, with the seam side down.
- Using a knife, make small hash marks so there will be 20 evenly sized rolls (about 1 to 1 1/2 inches wide; or make bigger rolls and yield 12 to 16). Hash marks create less guesswork once you start slicing and things get messier and harder to eyeball where to slice; the hash marks are nice place-markers.
- Use plain, unwaxed dental floss to slice the rolls. I highly recommend slicing the rolls with floss, not knives. Floss does not squish or compact the log like knives do.
- Arrange the rolls in the prepared pan, 5 rows of 4 rolls across. Cover with plastic wrap.
- Let rise in a warm, draft-free place until the rolls have nearly doubled in size, about 1 hour. (See note below)*
- Bake the Orange Rolls
- Bake at 375F for about 15 minutes, or until lightly golden on top and cooked through (ovens, dough, and climates vary and so will baking duration, but 1 to 2 minutes matters in this recipe). Watch rolls like a hawk and don’t overbake or they won’t taste nearly as good.
- Make the Orange Glaze
- In a medium bowl, add the orange juice, vanilla, confectioners’ sugar, optional salt, and whisk to combine; mixture will be thick.
- Drizzle in the milk as needed until mixture can be whisked smooth and is to desired consistency.
- Whisk in 2 teaspoons zest; set aside remainder.
- Evenly pour glaze over rolls.
- Evenly sprinkle with remaining 1 teaspoon zest.
- Serve immediately. Rolls are best warm and fresh, but will keep airtight at room temp for up to 4 days; reheat in micro for about 5 seconds to re-soften or as desired. I am comfortable keeping glazed rolls at room temp and do not recommend storing them in the fridge because they will dry out.
Notes
Making and Baking the Glazed Orange Sweet Rolls
Preparing the Dough
The base of every great roll is its dough, and this one stays soft and light thanks to the combination of butter, buttermilk, and eggs. Begin by adding flour, sugar, yeast, and a pinch of salt to the bowl of a stand mixer fitted with a dough hook. In a separate bowl, melt the butter, then stir in the buttermilk. Warm the mixture until it reaches the right temperature for activating your yeast. Aim for warm, not hot.
Pour the butter-buttermilk mixture into the dry ingredients. Lightly whisk the eggs and add them next. Let the mixer run on low speed for about five to seven minutes until the dough pulls away from the sides of the bowl. If it feels sticky, add just a touch more flour, one tablespoon at a time. It should be smooth but still soft to the touch.
Lightly grease a large bowl with cooking spray and transfer the dough to it. Turn the dough once to coat it in oil. Cover with plastic wrap and let it rise in a warm, draft-free spot for about two hours or until doubled in size. This slow rise helps create that pillowy texture that makes each roll irresistible.
Rolling and Filling
Once the dough has risen, gently punch it down to release air bubbles. Turn it out onto a lightly floured surface and roll it into a rectangle about 26 by 13 inches. Spread softened butter evenly across the surface, leaving a small border around the edges.
Next, spoon orange marmalade over the buttered dough. Spread it evenly with a knife so the surface is coated in a thin, fragrant layer. Sprinkle brown sugar on top and lightly pat it into place with your fingertips. The combination of marmalade and brown sugar gives the rolls their signature orange sweetness with a hint of caramel.
Starting at the long side, roll the dough tightly into a log. Use dental floss or thread to slice it into even pieces about one to one and a half inches thick. Arrange them in a greased 9×13-inch pan, five rows across and four down. Cover again with plastic wrap and let them rise for another hour until they’ve puffed and nearly doubled.
Baking the Rolls
Preheat the oven to 375°F while the rolls finish rising. Bake them for about 15 minutes or until the tops turn light golden brown. Keep a close eye on them since even one or two minutes can make a difference. When baked perfectly, they should be soft and slightly springy when touched.
Let the rolls cool slightly in the pan while you prepare the glaze. They’ll smell buttery, sweet, and filled with orange zest the kind of scent that can fill a whole house with happiness.
Glazing, Serving, and Enjoying Glazed Orange Sweet Rolls
Making the Orange Glaze
The glaze is the crowning touch that makes these rolls unforgettable. In a medium bowl, combine orange juice, vanilla extract, and confectioners’ sugar. Add a pinch of salt to balance the sweetness. Slowly drizzle in milk or cream, whisking until smooth and slightly thick. Stir in two teaspoons of orange zest for flavor and color.
Pour the glaze evenly over the warm rolls, allowing it to drip into the swirls and edges. Sprinkle the remaining zest over the top for a final burst of brightness. The glaze sets beautifully, creating a soft shine that contrasts with the golden dough.
Each roll will glisten with citrus sweetness. The combination of buttery bread, marmalade filling, and creamy glaze is everything a breakfast pastry should be — soft, fragrant, and deeply satisfying.
Serving and Storing
Serve these glazed orange sweet rolls warm for the best texture and flavor. The filling melts slightly, and the glaze stays glossy. Pair them with coffee or tea for a perfect brunch treat.
If you want to prepare them ahead, shape the rolls and refrigerate them before the final rise. In the morning, let them rest at room temperature for about an hour, then bake and glaze. You can also freeze baked rolls for up to six months and glaze them just before serving.
These rolls stay soft for several days when stored in an airtight container. A quick 5-second microwave warm-up will bring them back to that fresh-from-the-oven feel.

FAQs
What are glazed orange sweet rolls made of?
They’re made from a buttery yeast dough filled with orange marmalade and brown sugar, then topped with a smooth orange glaze made from juice, zest, and sugar.
How do you make soft and fluffy orange rolls?
Use warm but not hot liquid when mixing your dough. Let the dough rise in a cozy, draft-free spot and avoid adding too much flour. A slightly sticky dough always bakes softer.
Can I make orange sweet rolls ahead of time?
Yes. Prepare the rolls, place them in the pan, and refrigerate overnight before their final rise. In the morning, let them come to room temperature and bake.
What’s the best glaze for orange sweet rolls?
A glaze made from fresh orange juice, zest, powdered sugar, and a touch of vanilla adds the right mix of sweetness and citrus flavor.
Conclusion
Glazed orange sweet rolls are comfort in their purest form. Every bite brings a balance of soft dough, citrus filling, and silky glaze that brightens even the grayest morning. They’re simple to make but feel special, turning any breakfast into a moment to remember. Bake a batch, share them warm, and enjoy the golden glow that fills your kitchen.